Categories
Tags
-
#uk
#Small Business
#Sublimation Transfer Printing suppliers
#how to
#Ceramic Mugs
##Custom printing
#t-shirt printing
##Printing
#DOORMAT
#diy
#sublimation
#Heat Transfer Vinyls
##SmallBusiness
##PolymerProduction
#heat press
#Mugs and Cups
#vinyl
#Heat Transfer
#EtsySeller
#sublimation blanks
#hustle
#Heat Press Machine
#Sublimation Printing
#How to remove HTV
#print tips
Archives
How to Sublimate on Dark Cotton Shirts
-
Posted by Edi Jiang Filed in Business #t-shirt printing ##Printing #Heat Transfer Vinyls #heat press #sublimation blanks 94 views
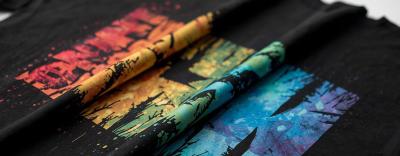
If you’ve ever tried to sublimate on a black cotton T-shirt, you probably already know how that story ends. You press it, peel it… and either nothing shows up, or the design looks dull and lifeless.
It’s frustrating—especially when customers clearly want black tees and soft cotton. The demand is there. The standard sublimation process just doesn’t cooperate.
The good news is this: you can get vibrant, professional-looking results on dark cotton. You just need to approach it differently.
This guide breaks it down in a practical, no-nonsense way—what actually works, what to avoid, and how to get consistent results you can confidently sell.
Why Your Usual Sublimation Setup Fails on Dark Cotton
Let’s start with the root problem, because understanding this will save you a lot of trial and error.
1. Sublimation needs polyester to bond
Sublimation ink doesn’t sit on top of fabric like regular ink. Under heat, it turns into a gas and bonds with polyester molecules.
Cotton doesn’t have those molecules.
So when you press sublimation ink onto cotton, there’s nothing for it to attach to. The result? Washed-out colour or no transfer at all.
2. Dark fabrics kill visibility
Even if a tiny bit of ink transfers, sublimation ink is naturally transparent.
On a white shirt, that’s fine.
On a black shirt, it’s basically invisible.
That’s why traditional sublimation is limited to light-coloured polyester. Not because it’s a preference—because it’s a requirement.
The Real Solution: Add a White, Polyester-Friendly Layer
Here’s the key idea that makes everything work:
You’re not actually sublimating onto cotton. You’re sublimating onto a polyester-compatible surface placed on the cotton.
Once you accept that, everything becomes much simpler.
All successful methods follow this principle in different ways.
4 Proven Methods That Actually Work
1. Sublimation Heat Transfer Vinyl (HTV)
This is the go-to method for most small businesses and print shops.
How it works
- Cut a piece of sublimation HTV, usually white
- Heat press it onto the cotton shirt
- Sublimate your design onto the vinyl layer
That vinyl becomes your printable surface.
Why do people like it
- Colours come out bright and sharp
- Works on any dark fabric
- Good balance between durability and feel
- Reliable for repeat orders
Where it shines
- Custom T-shirts
- Event merchandise
- Small batch production
If you want something that feels close to “real” sublimation in terms of colour quality, this is your safest bet.
2. Sublimation Flock for a Premium Look
If HTV is the standard option, flock is the upgraded version.
What makes it different
Flock has a soft, slightly raised texture. It’s thicker and gives a more premium, tactile feel.
Workflow
- Cut the flock material
- Press it onto the shirt
- Sublimate directly onto the flock
Why it stands out
- Rich, saturated colours
- Unique texture customers notice immediately
- Strong durability
Best use cases
- Fashion pieces
- Branded apparel
- Higher-end products
If your goal is to stand out rather than compete on price, Flock is worth exploring.
3. Sublimation Transfer Paper for Cotton
This method skips vinyl entirely, which some people prefer.
How it works
- Print your design on special sublimation paper for cotton
- Heat press it onto the shirt
- The paper creates a thin polymer layer that holds the ink
Pros
- No separate vinyl layer
- Good for detailed or photographic designs
- Smoother finish compared to HTV
Cons
- Durability varies depending on the brand
- Slightly less breathable than true sublimation
- More sensitive to pressing technique
This is a solid option if you want a softer feel but still need decent colour vibrancy.
4. Pre-Made White Patches
This method is simple and very consistent.
Process
- Sublimate your design onto a white patch
- Heat press the patch onto the shirt
Why it works
You’re working on a perfect white surface first, so colours come out exactly as expected.
Ideal for
- Uniforms
- Logos
- Kidswear
- Bulk production
It’s not seamless like direct printing, but it looks clean and professional—especially for branding.
What Changes Compared to Normal Sublimation
If you’re used to working with white polyester, here’s what you need to adjust mentally and practically.
Extra steps are unavoidable
Standard sublimation:
- Press
Dark cotton workflow:
- Cut or prepare material
- Pre-press shirt
- Apply the base layer
- Press again with the design
It takes more time. That needs to be reflected in your pricing.
The feel is different
On polyester, the ink becomes part of the fabric.
On cotton, the design sits on an added layer.
Some customers won’t notice. Others will. Set expectations clearly if needed.
Durability depends on your method
- HTV and flock tend to last very well
- Transfer paper varies
- Patches are extremely durable
Always test before offering a product commercially.
Practical Tips That Make a Big Difference
This is where most people either get consistent results—or waste materials.
Always start with a solid white base
This is non-negotiable.
No white layer = no colour visibility.
Pre-press every shirt
Even if it looks dry, cotton holds moisture.
A quick pre-press:
- Removes moisture
- Smooths wrinkles
- Improves adhesion
Skip this, and you’ll get uneven results.
Use the right pressure and temperature
Don’t guess.
Each material has its own recommended settings. Follow them closely, especially when trying a new supplier.
Too little pressure = poor adhesion
Too much heat = damaged materialKeep your designs clean and high-resolution
Dark garments highlight flaws.
- Avoid fuzzy edges
- Use sharp, high-quality artwork
- Stick to a strong contrast
Simple, bold designs often look better than overly complex ones.
Test before scaling
It sounds obvious, but it’s often skipped.
Before you:
- Launch a product
- Accept a large order
Do a wash test.
Check for:
- Peeling
- Fading
- Cracking
It’s much cheaper to fix issues early.
Choosing the Right Method for Your Situation
There’s no one-size-fits-all answer. It depends on what you’re trying to achieve.
- Want reliability and ease → go with sublimation HTV
- Want a premium feel → try flock
- Want a softer finish → test cotton transfer paper
- Want consistency in bulk → use patches
Think about your customers, your pricing, and your workflow—not just the technique.
The Bigger Picture
Sublimation on dark cotton isn’t “true sublimation” in the traditional sense.
But that doesn’t really matter to your customers.
What they care about is:
- Does it look good?
- Does it last?
- Does it feel comfortable?
Once you understand how to build that white, polyester-friendly layer into your process, you unlock a huge range of products that standard sublimation simply can’t reach.
Black tees, cotton hoodies, premium apparel—it’s all on the table.
And with the right setup, you can deliver results that look just as sharp and professional as anything printed on polyester.