Categories
Tags
-
#concrete
#asphaltplant
#Self Loading Concrete Mixer
#Concrete Batching Plant
#concrete pump
#trailer concrete pump
#Jaw Crusher
#Mobile Concrete Batching Plant
#Asphalt Mixing Plant
#concrete plant
#Crushing Plant
#crushing equipment
#crusher machines
#cone crusher
#stationary crushing plant
#Brick Making Machine
#self loader concrete mixer
#DUMP TRUCK
#Concrete Equipment
#mobile crushing plant
#Construction Equipment
#concrete pumping machinery
#concrete production
#construction machinery
#concrete mixing plant
#concrete boom pump
#selfloadingconcretemixer
#doubledrumasphaltmixingplant
#asphalt concrete
#asphalt batching plant
#concretebatchingplant
#operator of concrete mixing plant
#Aggregate Concrete Mixing Plant
#Hzs90 concrete mixer plant
#concrete pump truck
#automatic control
#concretemixerpump
#controlunit
#Belt-Type 90m³/H HZS90 Station
#concreteplant
#concretemixingplant
#concretemachinery
#concretebatchingmachinery
#Construction Materials
#crushing machine
#electric control
#dust removal equipment
#asphaltbatchingplant
#cold asphalt plant
#concrete mixing plants
#concrete plants
#control system of concrete batching plant
#mortar
#brickes
#crushingequipment
#stonecrusher
#constructioncrushingequipment
#mobile crushing equipment
#crushing machinery
#concrete pumping equipment
#concrete batching plants
#weighing methods of concrete plant
#automatic concrete batching plant
#concrete pumping control system
Archives
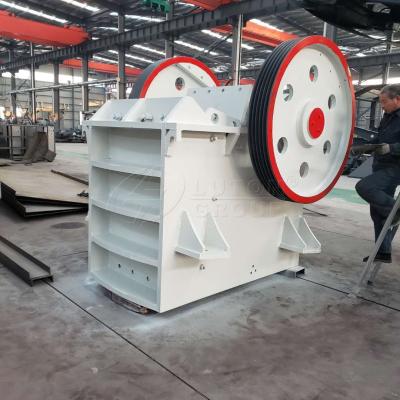
Initial Jaw Crusher Installation
-
In numerous industrial sectors, such as mining and construction aggregation production, jaw crushers are essential crushing equipment, fulfilling the crucial task of breaking bulk materials into a suitable particle size. To improve production efficiency and meet growing demand, a large mining company installed an advanced jaw crusher. However, during the initial installation, they encountered a series of challenging issues. Through the tireless efforts of a professional team, these issues were successfully resolved, enabling the equipment to enter operation smoothly.
Foundation Construction Deviations - The Challenge Of A Stable Foundation
Problem Emerged
Jaw crushing stations are large and heavy, placing extremely high demands on their installation foundations. During an initial inspection after foundation construction, technicians discovered significant deviations in the foundation’s levelness and elevation. The level deviations in some areas exceeded the allowable range for equipment installation, and the elevations did not meet design requirements. If these foundation conditions were not corrected, uneven force distribution would lead to increased vibration during equipment operation, compromising crushing performance and severely shortening the equipment’s service life, potentially causing safety incidents.
Solution
Faced with this challenge, the installation team acted swiftly. First, professional surveyors used high-precision measuring instruments to conduct a comprehensive and detailed re-survey of the foundation, accurately marking the specific locations and values of the deviations. Then, based on the measurement results, a detailed remediation plan was developed. For areas with significant level deviations, shims were installed to adjust the levelness. Construction workers carefully selected shims of appropriate thickness and specifications and laid them in a specific pattern on the foundation. By repeatedly adjusting the shims’ heights, the levelness of the equipment installation surface gradually reached the required levelness. Experienced workers were assigned to chisel and repair areas whose elevations did not meet design requirements. During the chiseling process, the depth and range of the chiseling process, the depth and range of the chisels were strictly controlled to avoid damage to the foundation structure. During the repairs, materials with the same strength grade as the foundation concrete were used to ensure the strength and stability of the repaired foundation. After several days of intensive construction and repeated testing, the foundation’s levelness and elevation finally met the equipment installation standards, laying a solid foundation for subsequent installation work.
Difficulty In Component Alignment - A Test Of Precise Fit
Problems Emerged
A jaw crusher station consists of multiple large components, such as the frame, movable jaw, fixed jaw, and eccentric shaft. During the assembly and installation of these components, uneven clearance between the components emerged, making alignment difficult. For example, the clearance between the movable jaw and the fixed jaw was excessive in some areas and too small in others. This prevented the movable jaw from forming a good crushing chamber with the fixed jaw during movement, affecting the crushing effect. The alignment of the eccentric shaft and the bearing also encountered obstacles. Due to machining errors or deformation during transportation, the eccentric shaft had difficulty fitting smoothly into the bearing. Forced installation could damage the bearing or scratch the eccentric shaft surface.
Solution
To address the difficulties in component alignment, the installation team established a dedicated technical team. Regarding the uneven clearance between the movable jaw and the fixed jaw, technicians first carefully inspected the mounting surfaces of the movable and fixed jaws and discovered defects such as burrs and protrusions on some of the mounting surfaces. They used sandpaper and files to smoothen these defects, ensuring a smooth and even mounting surface. Then, by adjusting the thickness of the adjustment gasket between the movable jaw and the fixed jaw, the size of the gap is gradually adjusted. During the adjustment process, feeler gauges and other measuring tools are used for real-time monitoring to ensure that the gap is uniform and consistent and meets the design requirements. To solve the problem of difficult docking of the eccentric shaft and the bearing, the research team adopted a hearing assembly method. They used professional heating equipment to evenly heat the bearings, and strictly controlled the temperature and time during the heating process to avoid overheating of the bearings and performance degradation. When the bearings were heated to the appropriate temperature, the eccentric shaft was quickly hoisted into the bearings, and the eccentric shaft was gently tapped with tools such as copper rods to smoothly seat it. After assembly, the bearings were allowed to cool naturally to ensure that the eccentric shaft and the bearings fit tightly.
Electric System Failure - Impediments To Power Operation
Problem Emerged
After completing the mechanical installation, the electrical system commissioning phase began. However, when the power was connected for a test run, an electrical system failure was discovered. Some electrical components within the control cabinet were malfunctioning, with indicator lights off or flickering abnormally. The motor had difficulty starting, making an unusual humming noise, or even failing to start. These failures severely impacted the normal operation of the equipment. If not promptly addressed, they could cause damage and delay production.
Solution Process
Electrical engineers quickly conducted a comprehensive inspection of the electrical system. First, they checked the power supply for normal operation. Using a multimeter to measure the voltage and current. They found that the power supply voltage was unstable and fluctuating. They coordinated with the power supply department to inspect and adjust the power supply circuit to ensure that the voltage remained within the equipment’s specified range. They then inspected each electrical component within the control cabinet and discovered that some contactors were experiencing poor contact, preventing proper circuit conduction. Engineers sanded the contacts with sandpaper to remove oxide deposits and dirt, restoring proper contact. Regarding the motor’s difficulty starting, they checked the insulation resistance and three-phase winding resistance of the motor and discovered a slight short circuit in the motor winding. They removed the motor and sent it to a professional repair shop for repair. The short-circuited area was insulated and the windings were rewound. After a series of repairs and adjustments, the electrical system returned to normal operation, the motor started smoothly, and all control functions functioned normally.