Categories
Tags
-
#fiber laser cutting machines
#laser cutter
##lasercuttingmachine
#CNC Granquartz
#3 In 1 Laser Cleaning Machine
#Plasma Cutting Table
#Laser Cleaning Machine
#CNC Wood Laser Cutting Machine
#laser paint removal machine
#CNC Router Factory
#3 In 1 Laser Welding
#Fiber Laser Welding Machine
#ATC CNC Router
#Cleaning Machine for Wood
#laser cut wood
#Plasma Cutter
#CNC PLASMA CUTTER
#Fiber Laser Welding Gun
#Laser Rust Removal Gun
#Metal Sheet Plate Laser Cutting Machine
#CO2 Laser Cutting and Engraving Machine
#Fabric Cutting Machine
#CNC Machines for Woodworking
#Furniture Making Machine
#Edge Banding Machine
#Rust Removal
#Digital Cutting Machine
#3D CNC Router
#Stone Bridge Cutting Machine
Archives
4×8 5×10 CNC Plasma Cutting Table for Sale
-
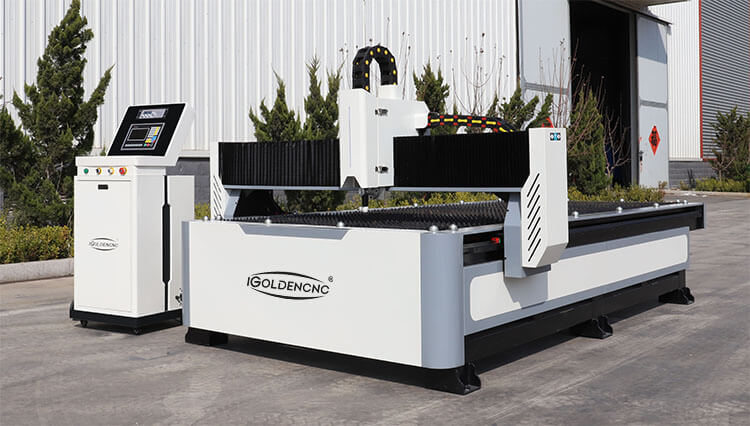
4×8 CNC Plasma Cutting Table
This is a 4×8 CNC plasma table cutter,it is very popular in the metal process industry.The 4×8 plasma table cutter has many advanced CNC plasma parts.Such as the high precision plasma cutting head, which has high precision cutting performance and cutting speed. And The aluminum profile gantry beam of this machine is a light duty and fast speed.A 4×8 CNC plasma cutting table is a versatile tool for small to medium-sized businesses and workshops involved in metal fabrication and metalworking. Its ability to cut metal sheets with precision, speed, and efficiency makes it an essential asset for those requiring high-quality and cost-effective metal cutting solutions.
so if you like this 4×8 plasma table for sale, we will provide the most affordable price and the most comprehensive service, please leave your contact information.
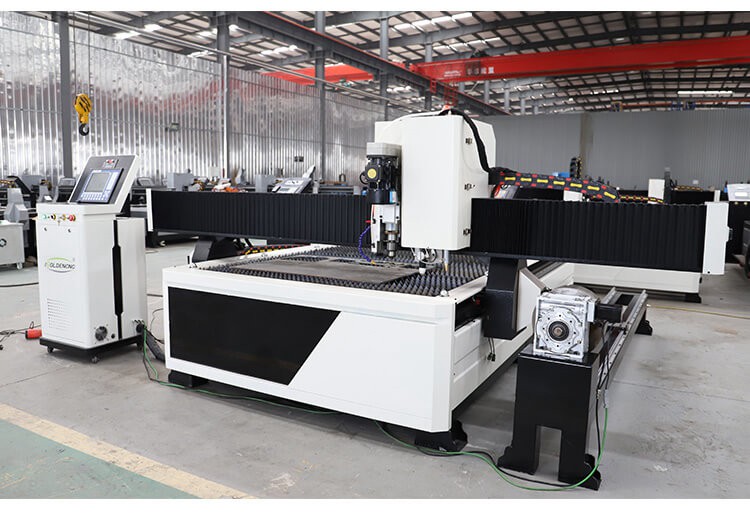
5×10 CNC Plasma Cutting Table
A 5×10 CNC plasma cutting table is a type of machine used for cutting various metal materials, primarily steel, The “5×10” specification refers to the size of the table, which measures 5 feet in width and 10 feet in length.
A 5×10 CNC plasma cutting table is a valuable tool for industries involved in metal fabrication and metalworking. Its ability to cut large metal sheets with precision, speed, and efficiency makes it an essential asset for those requiring high-quality and cost-effective metal cutting solutions.
Key Features of Cnc Plasma Cutting Table:
- Cutting Area: The 4×8 5×10 table provides a spacious cutting area, allowing for the processing of large metal sheets. This is particularly useful for industries that require large-scale metal cutting, such as metal fabrication, manufacturing, and construction.
- Plasma Cutting: Plasma cutting is a thermal cutting process that uses a high-velocity jet of ionized gas (plasma) to melt and remove metal from the workpiece. It is known for its speed and versatility in cutting various thicknesses of metal.
- CNC Control: The machine is controlled by a computer with CNC software. Operators can input cutting designs, and the CNC system precisely controls the movement of the plasma torch to follow those designs, resulting in accurate and repeatable cuts.
- Precision: CNC plasma cutting table offer high precision and accuracy in cutting metal materials, making them suitable for applications that require tight tolerances and intricate designs. Material Compatibility: These machines can cut a variety of metal materials, including mild steel, stainless steel, aluminum, and other alloys. They are versatile and adaptable to different types and thicknesses of metal.
- Speed and Efficiency: Plasma cutting is a fast and efficient process. The high cutting speeds and minimal heat-affected zones reduce production time and labor costs. Customization: Operators can create custom cutting designs, making it possible to produce unique components and parts. This is useful for applications in which specialized or one-of-a-kind pieces are required.
- Minimal Material Waste: Plasma cutting produces minimal waste, which is cost-effective and environmentally friendly.
- Reduced Setup Time: CNC plasma cutting table are designed for quick and easy setup, which is advantageous when switching between different cutting tasks or designs.
- Safety Features: These machines often come with safety features such as enclosures, fume extraction systems, and safety interlocks to protect operators and ensure a safe working environment.
- Dross Removal: After cutting, a process known as dross removal may be required to clean up the cut edges. Some machines include integrated dross removal systems or offer manual methods for this purpose.
- Maintenance: Routine maintenance is necessary to ensure the machine operates efficiently and lasts for an extended period. This includes tasks like cleaning, torch maintenance, and regular inspections.
What Is A CNC Plasma Table?
It is a type of automatic cutting machine with custom welding table top, which can be well adapted to cut metal projects with different sizes. The CNC controller will make it with a high degree of manufacturing flexibility, high accuracy, stable quality, high productivity, easy to improve working conditions, and are conducive to modernization of production management. Such a tool is a combination of a cutter and controller, which can give play to the greater advantages of gas cutting. In order to realize automatic machining, it must be capable of continuous feeding and automatic feeding, and the torch must be able to move separately or in combination in the horizontal and vertical directions to form the required curve. The various functional parts of the machine must be able to closely cooperate and coordinate to achieve precise continuous cutting. At the same time, various technical parameters can be flexibly adjusted and optimized to meet the cutting requirements of different metals.
What Are Plasma CNC Cutters Used For?
These machines are used for cutting sheet metals, square and round metal tubes, including iron, cold rolled steel, hot rolled steel, stainless steel, galvanized steel, carbon steel, copper, brass, alloy, bronze, aluminum, titanium. They are used for machine tool manufacturing, petro-chemical equipment, light-industrial machinery, pressure vessel, shipbuilding, mining machinery, electric power, bridge construction, aerospace, and steel structure. They are used in hobbyists, home shop, home business, small shop, small business, school education, and industrial manufacturing.
How Does A CNC Plasma Cutter Work?
Plasma cutting is a thermal machining method that uses the heat of a high-temperature ionized gas arc to melt at a metal workpiece, and to eliminate the molten metal by high-speed momentum to create a slit. They send an electric arc by using gas like oxygen, nitrogen or compressed air. This turns the gas to plasma, as well as it promptly blasts through metal to cut it with broadband. A flame cutting torch works by adding a blast of oxygen to the flame which oxidizes the metal and turns it into slag. The torch moves along a tool path with height control directed by a computer. The CNC implies that a computer is used to control the motion supported G-code in a program. Compared to handheld devices, plasma CNC cutters realize automatic machining with X, Y, and Z axis.
How To Use A CNC Plasma Cutter & Cutting Table?
For people who have never used a gas cutter or plasma table with computer-controlled controller. This is an easy-to-follow guide with software installation, setting, debugging, parts assembly, setup, and operation.
Manual Non-Contact Cutting.
Step 1. Touch the torch roller to the workpiece, and adjust the distance between the nozzle and the plane of the workpiece to 3-5mm. (When the machine cuts, the “Cut Thickness Selection” switch is upscale).
Step 2. Turn on the torch switch to ignite the plasma arc. After cutting through the workpiece, move to the cutting direction at an even speed. The speed is based on the premise of cutting through. Too slow will affect the quality of the incision and even break the arc.
Step 3. After working, turn off the torch switch and the arc goes out. At this time, compressed air is sprayed out at a delay to cool the torch. After a few seconds, the ejection stops automatically. Remove the torch to complete the entire process.
Manual Contact Cutting.
Step 1. The “Cut Thickness Selection” switch is at the low level, and it is used when cutting thinner metal plates by a single machine. Step 2. Place the torch nozzle at the starting point of the workpiece to be cut, turn on the torch switch, ignite the arc, cut through the workpiece, and then move uniformly along the cutting direction. Step 3. After working, open and close the torch switch. At this time, the compressed air is still spraying out. After a few seconds, the spraying will stop automatically. Remove the torch to complete the entire process. Automatic Cutting. Step 1. Automatic cutting is mainly suitable for cutting thick workpieces. Select the “Cut Thickness Selection” switch position.
Step 2. After removing the torch roller, the torch and the semi-automatic machine tool are firmly connected, and the attachment is provided in the random accessories.
Step 3. Connect the power of the semi-automatic cutting system, and install the radius rod or guide rail according to the shape of the project (if you need to cut arc or circle, a radius rod is required).
Step 4. If the torch switch plug is turned off, replace the remote switch plug (prepared in the accessories).
Step 5. Adjust the appropriate walking speed according to the thickness of the workpiece. And set the “up” and “down” switches on the semi-automatic cutter to the cutting direction.
Step 6. Adjust the distance between the nozzle and the workpiece to 3-8mm, and adjust the center position of the nozzle to the starting strip of the workpiece slit.
Step 7. Turn on the remote control switch. After cutting through the workpiece, turn on the power switch of the semi-automatic machine to cut. In the initial stage, pay attention to the seam at any time and adjust to a suitable speed. And pay attention to whether the two machines work normally at any time.
Step 8. After cutting, turn off the remote control switch and the power switch.
At this point, the entire process is completed. Manual Cutting Circle. According to the material and thickness of the part, choose the single or parallel cutting method, and choose the corresponding cutting method. Tighten the cross bar in the random attachment to the screw hole on the torch holder. To the required radius and tighten, then adjust the distance from the tip to the torch nozzle according to the length of the workpiece radius (the width of the slit must be considered). After adjustment, tighten the center fastening screws to prevent loosening, and loosen the cage to tighten the knurled screws. At this point, you can cut the workpiece.