Categories
- All Categories
- Business
- Technology
- Family & Home
- Health
- Sports
- Arts & Culture
- Entertainment
- Other
- Shopping
- Personal
- Society
Tags
-
#writing
#fish
#website
#art
#seo
#fashion
#Web design
#management
#wordpress
#life insurance|new york business insurance
#Home Improvement
#Health
#YouTube
#Hip Hop
#Business
#Branding
#Security Companies
#온라인카지노
#clothing
#news
#Culture
#thesis help
#Southwest Airlines
#cricket
#children
#online betting
#Custom Boxes
#Scuba Diving
#cenforce
#best camera
#Tech
#5 CAMPING AND TREKKING SPOTS IN MAHARASHTRA WORTH EXPLORING IN THE MONSOON NEEL GUDKAJULY 23
#2019 The rains are here! Escape the hustle of the city and spend some time in nature this monsoon. Here’s a list of some of the best camping and trekking spots aroun...
#Assignment Writers
#Crypto
#Company registration
#Web Scraping
#Data Analysis
#100% Custom Bobbleheads
#salesforce
##DataAnalytics #DataAnalysis #DataAnalyticsTool #Tool #WebScraping #BusinessGrowth #DataScience #DataMining #USA #France #NewBlog #UAE
##Pizza #pizzahut #dominos #marketresearch #marketresearchreport #businessdevelopment #USA #BusinessGrowth #Technology #growth #foodmanufacturing #France #NewBlog
#pets
#AI
#air
#carpet cleaning
#lifestyle
#online lottery
#image
#home essentials online shopping
#custom cbd boxes
#my assignment help uk
#dental bridges
#assignment writing service uk
#health is wealth
#udyam registration
#custom pillow boxes
#Assignment writing service
#psychic readings
#camping
#web development
#dogs
#chocolate
#Custom Cereal Boxes
#Real Estate Portal Development
#technical analysis
#Data Center Automation Market
#Assignment Writing Help
##fashion
#Chatbot Market
##메이저토토사이트추천
#3D Printing
#rigid gift boxes
#cryptocurrency news
#JetBlue Airlines flight reservations
#buy facebook likes
#เว็บสล็อต
#teen patti
#Saudi Arabia
#custom cigarette boxes
#briansclub
#CNC Machining Services
#Real estate agent
#“fashion
#Book Desert Safari Dubai
##Traditionalrugs
#Extended Reality Market
#mountaintrekking
#Air Valves
#Data Encryption Market
#new home builders Sydney
# Business
#Container Security Market
#Simulation Software Market
#comprar seguidores instagram portugal
#comprar seguidores instagram
#buy youtube views uk
#buy youtube likes uk
#Buy YouTube Subscribers UK
#Quantum Computing Market
#AZ-304 Exam Dumps 2022
#buy facebook likes uk
#buy facebook followers uk
#best bag
#Exin Exam Prep
#building and pest inspection Sydney
#dementia care facilities
#hoodies Denver
#jagarservice
#jaguarrepair
#web scraping and api
#api or web scraping
#web scraping api python
#hire remote developer
#careallpets
#investment management
##food
#brainsclub
#Designer dresses
#3D printing Services
#3D Printing Dubai
#residential roofing
#news web portal development
# web development
#Amazon SAA-C03 Dumps
#seo services dubai | best seo company in dubai | best seo agency in dubai
#cargo
#vaping
##toys
#Online Piano lessons in USA
#Cloud Computing Market
#3d emblems manufacturing technology in India
##hoodie
#Clothing apparel
#Cleansing facial wipes
#Product Development
#
Cryptocurrency Wallet Development
#Event Management Software Market
#affiliate marketing
#Best Diet Foods to Loose Weight
#Network Automation Market
#best body lotion for winter
##cryptocurrency exchange development#crypto exchange#exchange development#entrepreneur#Cryptocurrency exchange script
# travel
#Armoured Hoodies
#"website development"
#Hunting Game
#bad cholesterol
#bad cholesterol latter
#Amazon SAA-C03
##car dashboard accessories
##Best Car Accessories Company
#Custom reed diffuser boxes
#car care
#Car travel accessories
#thesis structure
#write my thesis
#Christmas Coloring Pages
#Custom Rigid Gift Boxes
#"SEO"
#How to Draw A Bluebird
#Draw A Bluebird
#Bluebird Drawing
#calla lily drawing
#BestProjectManagementSoftware
#signs aberdeen
#sign makers
#signs
#best logo design
#Animals
#An Airplane
#CodaTool
#BluebeamRevu
#cashmere hoodies for women
#SEO Digital Marketing Agency
#Testosterone Levels
#Video Conferencing Market
#Missed Flight Policy
#Nag tibba trek
#Triund trek
#Trekking near kasol
#KASOL
#rishikesh
#Floor Lamps
#Living RoomLamps
#Aviation courses
#Elf Bar 800
#red enchilada sauce
#business meeting
#Health and Wellness
#home care in Beverly Hills
#draw a triceratops
#French Montana
#Automotive Cybersecurity Market future
#AI and data privacy
#An Eye-Catching Certificate
#Best Certificate Template
#Unique Certificate Template
#Students Certificate
#Employers Certificate
#Professional Associations Certificate
#Recognition Certificate
#Motivation Certificate
#Sport certificate
#Academic Certificate
#Membership Certificate
#An employee of the Month Certificate
#Achievement certificate
#Internship Certificate
#Workshop Certificate
#Appreciation Certificate
#Course Certificate Template
#Experience certificate
#Digital Asset Management Market
#Hoodies
#Skull
#Wing
#how to draw
#Charlotte NC HOA
#web development Glasgow
#Carpet Cleaning London
#Carpet Cleaning Services
##Carpet Cleaning Services
##Carpet Cleaning London
##carpet cleaning #Carpet Cleaning London #Carpet Cleaning Services
#Comprarseguidoresreaisportugal
##niccehoodie
##gallerydepthoodie
# #drewhoodie#lifestyle
#Gift Ideas valentine's day
#seguidores instagram
#bape
#Zodiac Sign
#Scorpio Zodiac Sign
#Gemstone
#Crowdfunding Market
#car covers
#write my assignments
#best assignment writers uk
#master assignment
#help with assignment writing
#assignment master
#uk assignments
#Black nitrile gloves
#24 hour sign printing
#printing bethesda
#Commercial Printing Washington DC
##gbwhatsapp
#Bridesmaids Invitation
#bridesmaid Invitation make
#best invitation maker app for Android and iOS
#
#appdevelopment
#Pre-Engineered Metal Building Erectors
#Cyber Insurance Market
#Custom CBD Cream Boxes
#CBD Cream Boxes
#fear of god essentials
#creative designs tips
#Fish Types
#Gleamin promo codes
#Gleamin coupon codes
#Gleamin Discount Codes
#Gleamin Deals
#Gleamin Sale
#Dr. Jay Feldman
#SEO Expert in Pattoki
#Web scraping services
#Luxury Fashion Brands?
#sputnik chandelier gold
#k9 crystal chandelier
#blankets wholesale suppliers
#Scuba diving at Grand Island
#active whatsapp bot
#kawaii stuffed animals
#roof repair Denton County TX
#What Are The Chances Of Dogs Eating Oranges And Mandarins?
#How to draw A Cartoon Ocean
# Android
##whatsapp
#Portiva’s remote medical scribe jobs
#Technology Solutions Services
#What Organizational Development Services Can Do For Your Company
#salon towels bulk
#testing
#Taxi Centrale Amstelveen
#Funny Underwear For Women
#bulk napkins
#How to Protect Your Privacy With a Private Messenger App
#blank tshirt
#pagalworld song
#Lip care
#Aloe vera lip balm
#Moisturizing lip balm
#Business Freedom Stage
#Interior Design Tips to Transform Your Home
#How to Build a Relevant General Blog That Attracts Your Target Audience
#Certification PMP Exam
#AR 15 Stock
#How an Affiliate Tracking Platform Can Help Your Online Business
#restore your smile with dental implants
#briansclub cm
#Pagalworld MP3
#Swimming pools enjoyment safety factors?
#Pass Microsoft AZ-400 Exam With AZ-400 Exam Dumps
#best branding agencies los angeles
#best vape for weed
#Rafi Cricket Stadium
#Diamondexch id
#Cruiser Ebikes
#Streaming Websites
#1flixtor
#123mkv
#HIPAA Compliant Email Providers
#BriansClub cm Dumps Serious Threat to Your Identity and Finances
#Pro Grow
#Aloe vera gel
#Past Life Regression
#Best Architects in Lahore
#Soap2day WatchHDSeries OneFlixtor
#Thermal security camera
#When Sharksnado Was Released: A Look Back at the Cult Classic
#Navigating Camera Settings: ISO
#Aperture
#and White Balance Explained
#individual business coaching
#Organizational Development Services
#Psychoterapia Żoliborz
#Accounting Tax and Financial Services
#PromStyle
#PromPrep
#Cloud Storage Market
#plus-size-dresses
#weddingfashion
#motherofthebrideoutfit
#Formal wear for women
#MotherOfTheBrideFashion
#WeddingAttire
#LLC
#wedding guest dresses Canada
#plus size wedding dress for guest
#Free Advertising Sites to Market Your Business
#Gostream.world afdah Lookmovies
#Classified Advertising Sites - The Best Free Advertising Sites to Promote Your Business
#Shopify theme detector
#enjoy the 2023
#UwatchFree
#industrial work shirts
#how to create blog articles
#hotel quality towels
#poly box truck
#Local Pet Classifieds
#Master thesis writing service
#Lawn Mower Repair Corner
#How to Buy Crypto Without KYC
##buy Instagram followers canada
#Aloe Vera Shampoo
#buy Instagram likea
#team building 5 minute activities
#All Outdoors Power Equipment
#First convenience bank
#Glock slides
#How to Choose a Currency Arena FX Broker
#How to draw a Unicorn Girl
#Payback Ltd - Recover Your Money From Online Scams
#fine art restoration company
#Best Free Password Manager
#Graffiti Removal Service in Clarkston MI
#Getting Started With Cryptocurrency Guides
#ZuluTrade Review - Is ZuluTrade a Good Copy Trading Platform?
#clean pores
#The Importance of PVA Accounts for Email Marketing Campaigns
#Stay On Top Of The Latest Crypto News
#Choosing a Cryptocurrency Broker
#LW Casual Tie-dye Hollow-out Multicolor Ankle Length Dress
#Protein Supplements Pakistan
#Illinois paycheck calculator
#Mini Cooper Repair and Service
#vn88
#Accounting Tax and Financial Services- Fahim Ekbal Moledina
#Tel Aviv News
##HEALTH #FITNESS #BODYBUILDING #MEN #WOMEN
##youtube
#currency trading tips
#copy trading strategy
#coaching for performance
#bikini manufacturer
#shop fitting Scotland
#shop fittings
#web design Glasgow
#website design Glasgow
#spoken english language course
#spoken english language course in multan
#Study Abroad Consultants
#WiiCrypto Review
#WiiCrypto Review - How to Decrypt Wii Games
#BTCcrest Review - A Review of the BTCcrest Trading Platform
#FuturBTC Broker Review
#Drill rap
#Urban music
#Street music
#Gangsta rap
#Anonymous Social App Where You Can Post Anonymously
#Accounting Tax and Financial Services- Fahim Moledina
#Broker Reviews
#call our plumber in Nambour
#ZuluTrade
#Company Brochure Design
#Business Brochure
#Marketing Materials
#Branding Collateral
#crypto tokens
#crypto staking
#Host Family Dublin
#شركة ديجيتال ماركتنج
#DeFi scams
##CultureExploration
###sprayequipment
#Tax Relief Services
#online trading secrets
#Forex Founder
#OceanFX broker
#OceanFX broker review
#AI Global Group
#BITBINX broker
#BITBINX review
#PhoenixTB online trading platform
#
travel size soap bars
#cheap blankets in bulk
#buy lottery tickets online
#Nexus Trader
#ZuluTrade copy trading
#ZuluTrade forex trading
#digital coins market
#crypto news site
#HeraldSheets crypto news
#Certificado Digital Serasa
#ISA Investment online trading platform
#Introduction to ISA investment online trading platform
#Gens Markets Online Trading Platform Review
#How to get started with Gens Markets online trading platform
#What are the benefits of using Polar BTC?
#The benefits of using Polar BTC
#Genesis Exchange
#Introducing Genesis Exchange
#The benefits of using Central Broker
#Central Broker Trading Platform: The Ultimate Guide
#Nexus Trader online trading platform
#The features of Nexus Trader
#password manager
#Concepty online trading platform
#OceanFX online trading platform
#semiconductor
#manufacturing process
#failure analysis
#correlations
#semiconductor fabrication
#yield
#Fuelta online trading platform
#Payback LTD online trading platform
#Enduring Markets online trading platform
#Nexon Groups online trading platform
#PMP Exam
#PMP Certification in Hamburg
#Papa Murphy's Survey
#UK49 lotto game
#UK 49 lotto game
#education portal
#UK49s lottery game
#salesforce partner portal
#UK 49s lottery game
#proteção executiva
#hire salesforce developer
#eo finance mining service
#Youtube Mp3 Converter
#Makeup Artist Course in Chandigarh
#Best Makeup Artist Course in Chandigarh
#Professional Makeup Artist Course in Chandigarh
#Python training Course in Chandigarh
#Python training in Chandigarh
#Python Course in Chandigarh
#AWS Training Course in Chandigarh
#AWS Training in Chandigarh
#AWS Course in Chandigarh
#SEO Training in Chandigarh
#SEO Course in Chandigarh
#Cloud Computing Training in Chandigarh
#Cloud Computing Training Course in Chandigarh
#Cloud Computing Course in Chandigarh
#SEO Training in Chandigarh Sector 34
#HR Training Course in Chandigarh
#Personality Development Course in Chandigarh
#Personality Development Training in Chandigarh
# #digital marketing
#sex doll blowjob
#eominer crypto mining service
#Importance of Gathering Forex Broker Opinions
#dynamics 365 developer
#Currency Arena FX online trading platform
#TradesPeck online trading platform
#Australian Trader online trading platform
#Investments Global trading platform
#BWW Repair Shop near Tempe
#how to design furniture in Paint 3D
#Executive Transportation
#Payback Ltd fund recovery service
#buy Mega Millions tickets online
#USA Mega Millions lottery
#perfume packaging bottle suppliers
#best pre workout supplement
#Now.GG Roblox
#Fantom Wallets in 2023
#Crypto Mixers for 2023
#My Budget App budget planner
#Iganony Instagram Downloader and Viewer
#International Daily Finance news
#artificial intelligence robot trading
#ZuluTrade Forex Trading Platform
#ForexProfiles.com broker reviews blog
#table cloths wholesale
#Investments Global Australia review
#Investments Global Canada review
#Investments Global review online trading platform
#Plenum Ethernet Cable
#Fish Food in Dubai
#mount Rinjani trek
#Lombok Trekking
#Best Brokers List Sure Trade Group
#smocks for work
#Ome TV
#FinFinity Invest broker online trading platform
#forex tools
#forex tools trader
#web portal development
#keeper password manager
#password keeper
#Piano lessons Oakville
#password safe
#K9 security
#joinery and manufacturing dundee
#joinery and manufacturing fife
#Concrete Pumping Brisbane
#FinFinity Invest review online trading platform
#CypherMindHQ Crypto Trading Bot
#Payback Ltd review fund recovery service
# health
#Connected Agriculture Market
#How to Activate Optus SIM Using optus.com.au/activate
#Trade Plus Coin online trading platform
#Youtube to MP3 converter
#GPT Stocks Master ChatGPT Trading Course
#CypherMindHQ Online Crypto Trading Robot
#custom boxes psckaging
#PDO Thread Dissolving Methods
#famous dead people death redcords
#Equithy online trading platform
#ARPtrade online trading platform
##drewhoodie#lifestyle
#Over the Top Services Market
#dentist office open near me
#TradeOX online trading platform
#Global Affairs Canada Authentication
#Decorative Walls
#Stair Parts
#Projector Rentals
#LED Wall Rentals
#customer portal solutions
#At home spray tanning
#bronzedbyjulie
#Bradley Baseball Academy
#education portal development
#Lovingly Signed
#Personalised Jellycat
#InvestmentsGlobal Review online trading platform
#best food supplement in pakistan
#Poke Poke Mississauga
#Wedding Venues GTA
##Summerflower
#vinyl wraps for trucks
#guest blogging services
#salesforce customer portal
#Help2Cover insurance
#Wealth Management for Physicians
#more info about Madison Insurance Group here
#venture capital opportunities
#NRGCrypto cryptocurrency trading platform
#GMC Crypto online trading platform
#ArgusCapital online trading platform
#Central Broker online trading platform
#small business insurance
#financial planners Portland
#Retirement planning
#NordEquity online trading platform
#ttps://restoredair.com/
#AudemarsGroup online trading platform
#Main Forex News Forex Trading News and Analysis
#FuturBTC online trading platform
#TradeVision365 online trading platform
#Xm Global online trading platform Xm Bonus
#Jonathan Mimouni Crypto SEO Agency
#Trades Master online trading platform
#Equithy Review online trading platform
#Smart Home Market
#best acoustic guitars under 500
#best center channel speaker
#Swiss-Win online trading platform
#NRG Crypto Cryptocurrency Trading
#BIBU LED Sling Bag
#XCGIN online trading platform
#Cybersecurity Market
#Yalelodge
#Bauindustrie
#Robocheck
#NordVPN Review 2023: A Top VPN Option
#XCGIN review online trading platform
#Stone Bridge Ventures online trading platform
#We Financial online trading platform
#Traders International Online Trading Blog
#web development companies
#hire dynamics 365 developer
#social science Israel 2023
#social networking for marketing
#socialnetworkingformarketing
#purekonect
#heavy duty laundry carts
#Play Mega Millions online
#newest sex doll
#Mega Sena tickets online
#Algeria lottery play online
#Arrow Capitals online trading platform
#Customer Relationship Management Market
#How does Payback Ltd help people recover their money?
#healthcare portal development
#ZuluTrade Review copy trading platform
#Mount Kerinci Trekking tour
#Greensboro Sports Training
#Data Center Infrastructure Market
#Corporate Catering Service in Mississauga
#Full-Service Catering in Mississauga
#Stairs Balusters
#Outdoor Full Catering Service
#Full-Service Corporate Catering Trends
#Full-Service Corporate Catering
#Temp Mail - Disposable Temporary Email
#Tempmail Generator - Free temporary email addresses
#Trade Galactica review online trading platform
#5G Infrastructure Market
#dynamics 365 partner portal
#Anime Leather Jackets
#anime jackets
#YTMP3 Converter
#10ml 15ml dropper bottle wholesale
#AI Global Group Cryptocurrency Trading
#Public Safety and Security Market
#Temu coupon code
#AI Global Group Review Cryptocurrency Trading
#boat
#yacht
#AI Global Group Broker Cryptocurrency Trading
#salesforce self service portal
#selling your home without an agent
#Play Huge Lottos online lotto
#"best seo services
#Will Bradley Sports Performance
#Full Service Catering Mississauga
#Full Service Corporate Catering Mississauga
#Full Service Wedding Catering
#Rinjani Trekking Info
#Rinjani Trekking
#Full Service Corporate Catering
#Stair Railing Parts
#Trade Shows Equipment Rental
#Event Staging Rentals
#Inspection & Certification Market
#udyam registration portal
#long haired dalmatian
#what is long haired dalmatian
#Light In Fitness: Professional weight machines and Fitness equipment
#Affirmed Recovery fund recovery service
#Fergatex online trading platform
##IndustrialUses
#Smart Ticketing Market
#IronGatesFX online trading platform
#Terra Private review online trading platform
#Investments Global online trading platform
#Investments Global online trading platform?
#Henderson Palmer online trading platform
##gym supplement
#Arrow Capitals review online trading platform
#wefinancial.io review online trading platform
#Identity-as-a-ServiceMarket
#Go4rex online trading platform
#Tokenhell blockchain and crypto news agency
#The Process of Load Bearing Wall Removal
#Masonry Estimation
#what is Masonry Estimation
#top 10 CBD oils
#Grand Dragon lotto
#what is Grand Dragon lotto
#Hong Kong VPN
#what is Hong Kong VPN
#Cyber Investigation review
#what is Cyber Investigation review
#Binbitex online trading platform
#laser machine cutting
#waterjet services
#Market Haven review online trading platform
#Data Mining Tools Market
#ZuluTrade Forex Trading Platform: The Ultimate Guide
#ZuluTrade copy trading platform
#The Benefits Of ZuluTrade Forex Trading Platform
#Is ZuluTrade a safe and secure platform?
#ZuluTrade Forex Trading Platform: The Future Of Online Trading
#ZuluTrade copy trading platform: The Future Of Online Trading
#ZuluTrade copy trading platform: A Comprehensive Review
#How To Start ZuluTrade copy trading platform
#mobile mechanic in phoenix az
#mobile auto mechanic near me
#online trading platform
#recommended broker
#what is recommended broker
#European online broker
#what is European online broker
#Tokenhell blockchain and crypto news agency: An Overview
#How Clear Skin Days Blemish Treatment Cream Can Boost Your Confidence
#gimkit
#Chat GPT login
#A Comprehensive Guide to MIT 45 Kratom
#What’s that smell Food Fitness Family? affect Weight Loss?
#b2b web portal development
#Cryptos Area online trading platform
#HBL-Scf online trading platform
#Coin Investor online trading platform
#b2b vendor portal
#google workspace pricing
#global cybersecurity market
#LeoTradez cryptocurrency platform
#Liteboxer Fitness Bundle: A Comprehensive Review
#How Travel Savvy Mom Blog Can Help You Plan Your Next Adventure
#Artificial Intelligence of Things Market
#Trade Galactica online trading platform
#GMfunds online trading platform
#Financial Analytics Market
#Savastan0
#Predictive Analytics Market
#bulk bath towels
#Exploring the World of Main Sports News: A Comprehensive Guide
#Introducing To Tokenhell blockchain and crypto news agency
#Buy hoodies online
#OTT Market
#Unveiling the Tesler Online Trading Platform: A Revolutionary Way to Trade
#Speech to Text API Market
#Unveiling Immediate Edge: A Revolutionary Cryptocurrency Trading Software
#Explore the Power of Bitcoin 360 AI Erfahrungen in Maximizing Your Investment Potential
#5G Infrastructure Market Analysis
#SERPutation Forex SEO Agency
#SERPutation Crypto SEO Agency
#Global Global ICM online trading platform
#Product Life Cycle Management Market
#pemf machine for animals
#what is pemf machine for animals
#RedstonePro online trading platform
#3D Secure Pay Authentication Market
#action toys
#vendor management
#Title: From Commentator to Millionaire: Jesse Watters' Impressive Net Worth
#customer self service portal
#Spicing Up the Celebration: Bachelorette Party G-String Ideas
##car garage
#Hyperscale Cloud Market
#uk49s code
#pet dental care
#Self-service BI Market
#AUventure: Where Trading Meets Innovation Online
#Bit GPT AI: Your Secret Weapon for Successful Crypto Trading
#AWS Training and Certification
#Unlocking Crypto Trading Potential with Bit GPT AI
#Exploring Bit GPT: The Future of Crypto Trading Automation
#Immediate Edge in Practice: User Experiences
#Quantum AI in Healthcare: Transforming Diagnosis and Treatment
#Experience Intimate Connections with One-on-One Cam Free Video Chat
#PVA
#In-Depth Examination of WilliamYoungs.net: A Crypto Broker Review
#SERPutation Forex SEO Agency: Your Key to Online Success
#ZuluTrade: Your Gateway to Profitable Copy Trading
#Copy Trading Made Easy: ZuluTrade's Innovative Platform
#Phoenix's On-the-Go Auto Mechanic: Your Convenient Car Care Solution
#Santa's Favorite Helper: Celebrating the Spirit of Giving
#Precision in Market Timing: GemsCode Falling Knife Indicator
#Exploring the Features and Benefits of JX-ftwd Online Trading Platform
#3D Virtual Fence Market
#Global ICM vs. Competitors: What Sets It Apart in Online Trading?
#RontoXM Online Trading Platform: A Smart Investor's Choice
#Mastering the Art of Trading with ArgusCapital Online Platform
#Bit GPT Review: Unleashing the Power of AI in Crypto Trading
#3-Point Slinger Systems: A Must-Have for Filmmakers
#crazy princess renia spoiler: A Royal Family's Hidden Shame
#BitGPT: Your Ultimate Crypto Trading Account Manager
#The Current Dogecoin Price: What Investors Need to Know
#Unlocking Crypto Trading Success with Oil Profit
#Japanese Knife
#essentials tracksuit
#red sp5der hoodie
#Mastering Monetize Magnet: Your Guide to Affiliate Marketing Success
#Uncovering the GPT Definity Scam: Fact or Fiction?
#Invest2Euro Premier: Where Expert Guidance Meets Online Investing
#Humanity
#His and Hers Matching Hoodies: A Love in Harmony
#Israel email list
#Ear Cleanser
#Bitcoineer Website: Your Gateway to Cryptocurrency Knowledge
#Financial Freedom in the Bitcoin Bank Breaker Plattform Age: What You Need to Know
#The Artistry of Fancy Diamonds: Elegance in Every Facet
#Time Crypto Market Trends Unveiled: Visit Our Website Today
#Global Insights and Boredom Busters: Dive into Our Latest News Blog
#The Bitcoin Code Review Uncovered: What Traders Need to Know
#Teething Straws: Soothing Solutions for Teething Toddlers
##hardwork
#Becoming a Bitcoineer: Tips for Thriving in the Bitcoin Economy
#table cloths bulk
#businees
#Exploring the Best Oils for Sun Spots: Natural Remedies for Clearer Skin
#One-Night Skin Tag Removal: Tips and Tricks for Success
#Taste Test: Ranking the Best Protein Powders for Flavor
#Meeting New People on LuckyCrush Webcam Chat: A Fun and Exciting Experience
#Empower Your Investments with NMTconsult
#Unlock Mega Millions Fortune with PlayMegaMillionsOnline.com
#Breaking the Ice: How to Talk to Random Strangers
#Mastering Trade Zone Crypto: Tips and Tricks
#The Future of Trading: FinReserve's Innovative Online Platform
#FinReserve Online Trading Platform: Unveiling the Power of Digital Trading
#Unveiling the Secrets of Successful Cryptocurrency Trading with timecryptomarket.com
#Get Globally Bored with the Wacky World of News Blogging
#Cam Chat Apps: Which Ones Should You Try?
#Custom Hoodies
#BTC Definity Pro: Unlocking the Potential of Crypto Investments
##fruits
##smells
##art
##snack
#The Art of Building B2B Food Marketing
#Investing with Confidence: The HudsonTrust Advantage
#combine humanity and art
#business expand
#Value of Leo Carty Print Valuation
#leo carty print
#value of leo carty print
#Avatrade Avis: Pros
#Cons
#and Features
#Essentials Hoodie
#Navigating the World of Trading with QualityBrokers
#Outdoor Enthusiast's Paradise: Things to Do in Utah
##bape #mensfashion #FashionUSA
#Discovering the Compact Power of Elux Legend Mini Disposable Vape
#Empowering Bloggers: How Ai Write Blog Efficiently
#Shop Multi Split System Air Conditioners
#A Look into the Technology Behind Tradelly.Ai Success
#commercial locksmith in Dallas
#Affordable locksmith services in Dallas
#Historic Unity: Arabs stand with Israel
#Comprehensive Care at Ghaly Sleep Center: Your Sleep Health Partner
#The Hidden Dangers of Water Damage Restoration Blog: Protecting Your Home and Health
#Kangaroo Travel's Utah Odyssey: Discovering Unique Experiences in the Beehive State
#website to talk to strangers
#Construction contractor in Brooklyn
#brick pointing services in Brooklyn
#Hang Hammock Chair from Ceiling: Step-by-Step Installation Guide
#Crystal Pro Max: 4000 Puffs of Flavorful Vapor at Your Fingertips
#healthy care
#Expert HVAC Mesa AZ Technicians: Your Climate Control Specialists
#Virtual Reality Gaming Market
#Rapid Response Fort Lauderdale Water Damage Repair
#From Concept to Creation: The Process of Engineering Works
#Unlocking the Power of LinkedIn for Career Growth and Networking
#Plumber Phoenix: Keeping Your Water Flowing Smoothly
#Venture Bell Review Trading: A Closer Look at Features and Performance
#Driving in Luxury: Monthly Car Rental in Dubai
#StakeStocks Online Trading: The Future of Financial Freedom
#VerveMart Online Trading Platform: A Comprehensive Analysis
#People Magazine
#Epic Books
#FlareGain Online Trading: A Detailed Review of Features and Benefits
#Shopping Made Easy: Exploring Taobao in English for Global Shoppers
#Elf Bar MC600: Unveiling the Next Level of Vaping
#Invest with Confidence: Weinstein Corp's Online Trading Expertise
#The Coin Collector's Corner: Dive into the Latest Coin News
#services
#The Pinnacle of Web Development: wordpress agentur zürich
#Hayati Crystal Pro Max Mini Disposable Vapes | 4 For £14 - Unbeatable Offer!
#Temperature Sensors Market
#ACTION Termite & Pest Control: Effective Solutions for a Pest-Free Environment
#Omegle Video Chat: Unveiling the Thrill of the Unknown
#A Comprehensive Guide to the InterActive Online Trading Platform
#Innovation in Visual Storytelling: Blue Stars FX
#Stay Ahead of the Curve with Israel News Pulse Updates
#weight loss injection
#IoT In Healthcare Market
#Decoding Financial Strategies: Short-Term and Long-Term Loans Unveiled
#A New Reflection: The Transformative Path After a Degloved Face
#Tubidy Treasures: Your Guide to Musical Exploration
#Kratom Powder Pro: A Comprehensive Guide to Expert Use
#Bridging Communities: The Leadership of Jackson Hinkle
#Behind the Mask: Exploring the Emotional Impact of a Degloved Face
#Behind the Impact: Rachel Stone's Triumph Over a Car Accident
#Navigating the Markets with Lunofx: A Comprehensive Guide to the Online Trading Platform
#WARN Act
#company registration in India
#web portals
#Custom Acrylic Keychains
## seopackagesinindia
#Coffee Box
#Is Linux easy to learn?
#What are the different makeup services?
#Tally vs QuickBooks
#MYOB Accounting Software
#Improvеd Air Quality
#best lawn fertilizer
#lawn liquid fertilizers
#Blockchain Software Developers
#web3 jobs
#web3 career
#blockchain developer jobs
#web3 developer jobs
#smart contract developer jobs
#Essentials
#CRTZ
#Corteiz
#Cortiez
#Essentials Hoodies
#Eye Doctors in Arlington Heights
#e Doctors in Arlington
#Security Guard Services in USA
#Hellstar
#Hellstar Hoodie
#Hellstar Shirt
#comfortable safety glasses
#safety eyewear
#safety eyeglasses
#Tommy Hilfiger Eyeglasses
#Sp5der Hoodie
#Eric Emanuel Shorts: A Comprehensive Exploration of Style
#and Influence
#saxenda ireland
#slot online
#Healthy Eating for Real Life
#Video Album
#Wedding Video Album Book
#Our Wedding Video Book
#FTP Calculator by Age and Gender
#FTP Calculator
#Dubai Social Media Strategy
#Power Of Influencer Marketing In Dubai
#BBC iPlayer top guides
#Mexican TV top guides
#style \
#How to Use Web Scraping to Earn Money
##sp5der
##sweatpant
##weekndmerch
#essentials clothing
#essentials T-shirts
#essentials jackets
##Hoodies
#Perfect Camera
##what does grunt style mean
#Extended Carpet Lifespa
#Jason Grosfeld
#Animation Studios in Houston
#3d printing uae
#SEO in Saudi Arabia
#Saudi SEO Company
#SEO company in Saudi Arabia
#Virtual Shop
#Virtual Store
#Virtual Space
#3D Store
#AI Avatars
#Zeniva AI
#AI Content Creator
#Moringa Powder
#Gum Health
#check domain authority
#Best Check Domain Authority
#Free Check Domain Authority
#turo clone
#Manufacturing Piping Solutions
#Best Manufacturing Piping Solutions
#bclub login
#bclub
#bclub.best
#russianmarket.to
#russianmarket
#3D Printer Cost
#custom pulp design trends
#monopoly medicine companies in India
#PCD franchise companies in India
#pharma companies in Chandigarh
#PCD pharma companies in Chandigarh
#who gmp certified pcd company
#What Cat Breeds Are Hypoallergenic
#CBD Roll-On For Muscle Pain Relief
#Pain Roll-On 3500mg
#CBD Roll-On For Pain Relief
#HPSJ Healthcare
#. Organic SEO Services
#Reduce stress and relax
#What is PE ratio
#bad credit tractor trailer financing
#semi truck financing for bad credit
#Brass CNC Machining
#molded pulp packaging design
#Virtual Ecommerce
#sell used laptops for cash
#Wire EDM Machining
#Morning Buggy Desert Tours
#moulded pulp
#White Label Turo App
#Turo clone script
#consolidation loans
#Plastic Injection Molding Parts
#ASUS 1060 Graphics Card
#Parts Of CNC Machine
#luxury interior design
#Bangalore interior designers
#home interior decorators in Bangalore
#upscale home design
#modern luxury interiors
#resilientgatevalve
#Resilient Seated Sluice Valve Manufacturer
#Excess Inventory Management
#Cistern
#amazon oa work simulation
#Westbourne College Singapore
#aerospace industry
#Kotora Melnkalne
#sheet metal prototyping
#Custom quick turn injection molding services
#how much does a large cardboard box weigh
#Company Registration in Dubai
#digital wallcoverings
#pre-clinical gastrointestinal CRO
#authentic South Indian cuisine delivery
#steam boiler in textile industry
#LVP Near Me
#LVP
#Broadway Pizza MM Alam Road
#Broadway Pizza Franchise
#optp.pk
#https://delttaexecutor.com.br/
#ITSM ServiceNow
#ITSM
#Car exporter to Africa
#solar battery in Pakistan
#metal machining service
#property for rent in dubai
#Microneedling with Radio frequency
#allergy therapy
#commercial wallcovering
#LBP (live biotherapeutic) research
#what color does orange and yellow make
#110V Extension Lead 14m
#Online Pizza Discounts Pakistan
#digital marketing companies in sharjah
#advertising companies in abu dhabi
#buy cigarettes online
#iqos heets
#cigarettes online
#text
#tool
#ENT specialist West Yorkshire
#Tonsillectomy in adults
#online plant nursery Pakistan
#buy seeds online Pakistan
#Parapet wall installation & Repair in Bronx
#lectura psíquica (psychic reading)
#60cm gas cooktop and electric oven package
#Best softshell winter jacket
#Best aloe vera lotion
#loyal4d
#custom cnc machining service
#view partner hours Starbucks
#david lloyd cancellation policy
#Prusa Mini
#Photobooth Web technology
#Best Applebee’s happy hour deals
#precision CNC machining for industrial parts
#online cnc machining services china
#Lewei machining company
#company registration in the British Virgin Islands
#model making dubai
#model making uae
#model making services
Archives
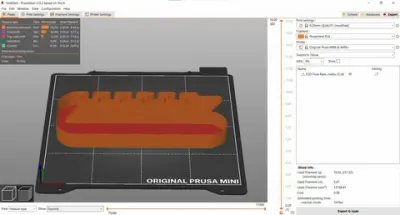
How to Calibrate Your Prusa Mini for Perfect Prints
-
Calibrating a 3D printer is an essential step for achieving high-quality prints, and the Prusa Mini is no exception. While the Prusa Mini comes factory-calibrated, repeated use, environmental factors, and material changes can impact print quality. Proper calibration ensures that your printer consistently produces smooth layers, accurate dimensions, and minimal defects. This guide will walk you through the key steps to calibrate your Prusa Mini for perfect prints, whether you are a beginner or a seasoned enthusiast.
By taking the time to calibrate your Prusa Mini, you not only improve print quality but also extend the lifespan of your printer. Proper calibration reduces issues such as layer shifting, stringing, and under- or over-extrusion. Moreover, well-calibrated machines use filament more efficiently and reduce wasted prints. With careful attention to detail, you can transform your Prusa Mini into a reliable, precise tool for all your 3D printing projects.
Leveling the Print Bed
The first and most crucial step in calibrating your Prusa Mini is bed leveling. An uneven print bed leads to poor adhesion and warped prints. The Prusa Mini features a mesh bed leveling system, which uses the printer’s sensor to map the bed surface. Begin by ensuring your print bed is clean and free of any debris. Navigate to the calibration menu on your printer’s LCD screen and select “First Layer Calibration.”
During this process, the printer will probe multiple points on the bed to measure height variations. It’s important to carefully follow the on-screen instructions, adjusting the bed manually if prompted. Proper first-layer calibration ensures that the nozzle maintains the correct distance from the bed across the entire surface. Once complete, your first layers will stick better, and the overall print quality will improve significantly, reducing failed prints and uneven layers.
Calibrating the Extruder
After leveling the bed, focus on extruder calibration. The extruder determines how much filament is fed through the hotend, directly affecting print quality. Start by measuring the actual filament extrusion using the Prusa Mini’s calibration routine. Input the desired extrusion length, and the printer will extrude a specific amount of filament. Measure the actual amount extruded using a caliper or ruler and compare it to the expected value.
If there is a discrepancy, adjust the extruder steps per millimeter (E-steps) through the printer settings. Precise extruder calibration ensures that your Prusa Mini delivers the correct filament volume, preventing issues like under-extrusion, gaps in layers, or over-extrusion, which can lead to blobs and stringing. A well-calibrated extruder produces clean, strong prints with excellent dimensional accuracy, allowing you to achieve the perfect finish.
Fine-Tuning Nozzle Temperature
Nozzle temperature plays a critical role in print adhesion and surface finish. Each filament type, such as PLA, PETG, or ABS, has a recommended printing temperature range. The Prusa Mini allows you to adjust the nozzle temperature directly from the LCD screen or through your slicer software. Start with the manufacturer’s suggested temperature and perform a test print, paying close attention to layer adhesion and stringing.
Adjust the temperature incrementally if you notice issues. Too high a temperature can cause filament to ooze and string, while too low a temperature can lead to poor layer adhesion and weak prints. By fine-tuning the nozzle temperature, you optimize the flow of filament, resulting in smoother surfaces and stronger prints. Consistent temperature calibration also reduces the likelihood of clogs and prolongs the lifespan of the nozzle and hotend components.
Calibrating the Z-Offset
The Z-offset determines the distance between the nozzle and the print bed. Even if the bed is perfectly leveled, an incorrect Z-offset can cause the first layer to be too squished or too loose. On the Prusa Mini, adjusting the Z-offset is straightforward via the LCD menu or the PrusaSlicer software. Begin by measuring the gap using a sheet of paper between the nozzle and bed and make small adjustments until slight resistance is felt when moving the paper.
A correctly calibrated Z-offset ensures the first layer adheres properly without being compressed, which is essential for print stability. Improper Z-offsets often result in peeling corners, poor adhesion, or uneven layers. By mastering the Z-offset calibration, your prints will stick consistently and maintain excellent dimensional accuracy, reducing print failures and filament waste.
Running Test Prints and Fine Adjustments
Once your Prusa Mini is calibrated, running test prints is vital to verify all adjustments. Begin with simple calibration cubes, Benchy models, or geometric shapes designed to reveal common printing errors. Examine the test prints for issues like layer misalignment, stringing, or over-extrusion. Take notes and make fine adjustments to extrusion multiplier, print speed, or temperature as needed.
Test prints allow you to refine your Prusa Mini calibration over time, adapting to different filament types and environmental conditions. Repeating test prints after major changes, such as replacing the nozzle or switching filament, ensures consistent quality. With continuous attention and fine-tuning, your Prusa Mini will achieve near-perfect prints, giving you confidence in every project and maximizing the value of your 3D printing experience.
Conclusion
Calibrating your Prusa Mini is a combination of patience, precision, and attention to detail. By systematically leveling the bed, calibrating the extruder, adjusting nozzle temperature, fine-tuning the Z-offset, and running test prints, you ensure your printer produces high-quality, reliable results. Regular calibration also prevents common printing issues and maximizes the lifespan of your printer and filament.
With these steps, you can unlock the full potential of your Prusa Mini, achieving professional-quality prints with minimal effort. Whether you are printing functional prototypes, decorative objects, or intricate models, proper calibration lays the foundation for consistent success. Investing time in calibration today saves frustration and improves your 3D printing experience for years to come.